The main calendar in Practice Master Pro can be colour coded to your own specifications and displays booked appointments or availability for your practitioners and can also display appointments by room. You can show different calendars side by side or combined in to a single colour coded view.
The calendar has two distinct views:
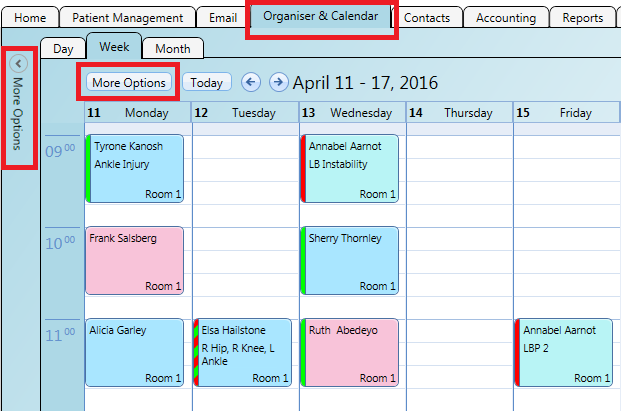
Step 1
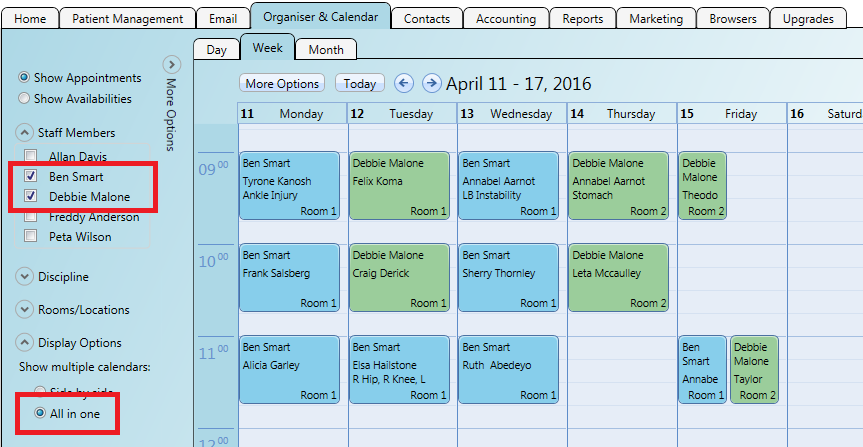
Click on the main 'Organiser & Calendar' tab to view appointments. Notice the 'More Options' side panel.
Step 2
If you expand the side panel 'More Options' panel you can select other practitioners or rooms to add to your calendar.
The other calendars will appear side by side in the main calendar area.
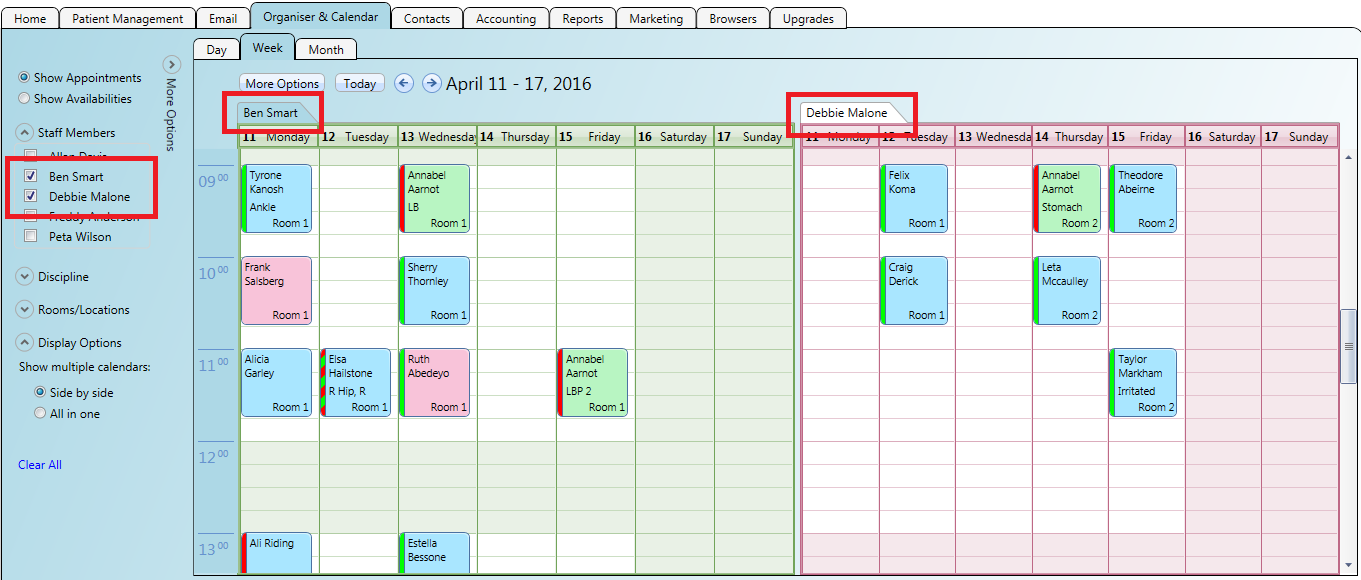
Step 3
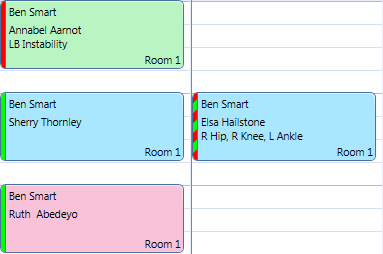
You can show practitioner calendars as well as room calendars in the same view.
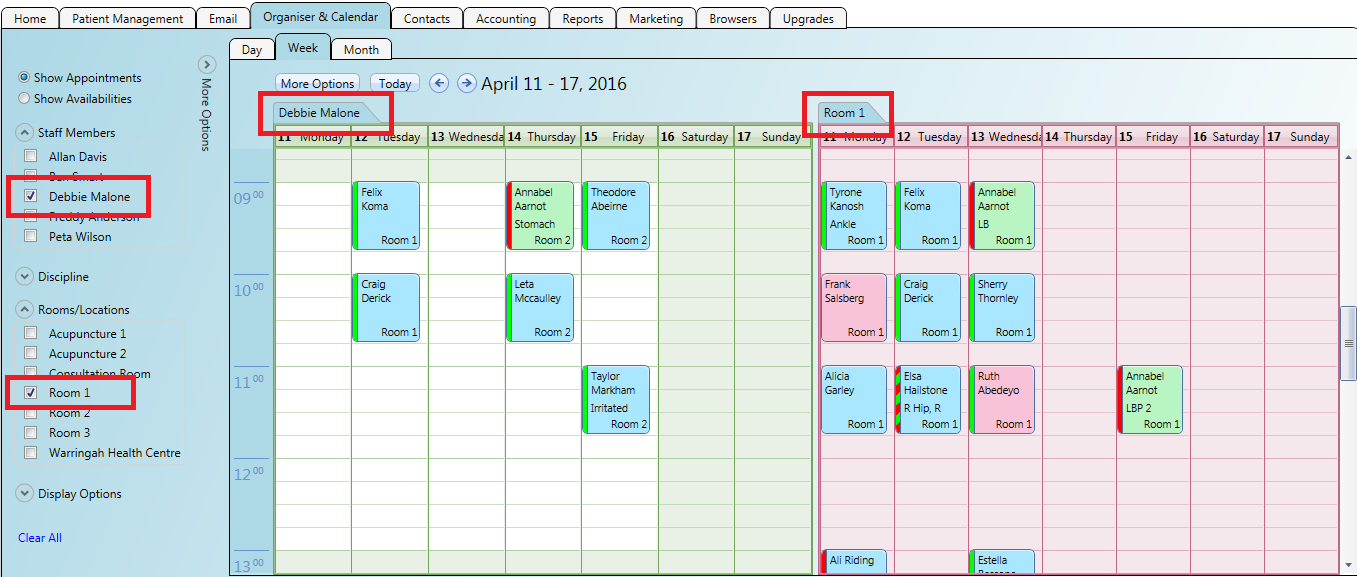
The calendar images above show 'side by side' calendars for each user/room next to each other. You can combine separate calendars in to a single one and each set of appointments will be given its own colour. New colours will be assigned to new users or rooms as they are added to the calendar.
Booking by availability can help reduce booking errors if you have a receptionist booking for you and/or work at more than one physical location during the week. As practitioners will usually have more than one appointment type with different start options, locations and durations it can be difficult for receptionists to remember all the different specifics of your practitioners appointments when booking patients in. Availability view along with 'Appointment Types' makes this process easy and less error prone and very fast.
Step 1
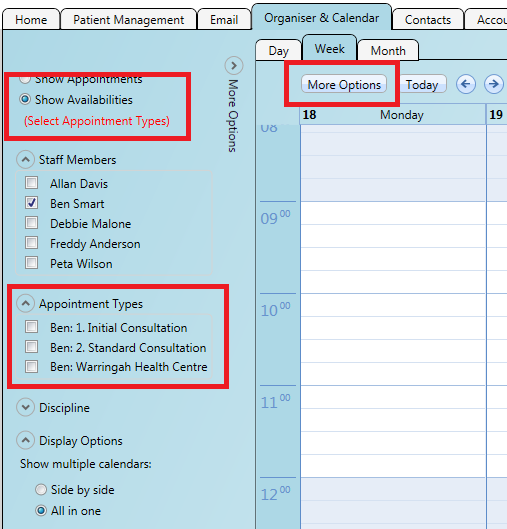
Open the 'More Options' panel and select 'Availabilities' at the top.
Step 2
When you have a user selected in the 'Staff Members' area of the 'More Options' panel you will notice the 'Appointment Types' collection becomes visible and open. If you select
more than one user then you will see all the appointment types for the selected users. You must select at least one appointment type for the availabilities to appear on the calendar.
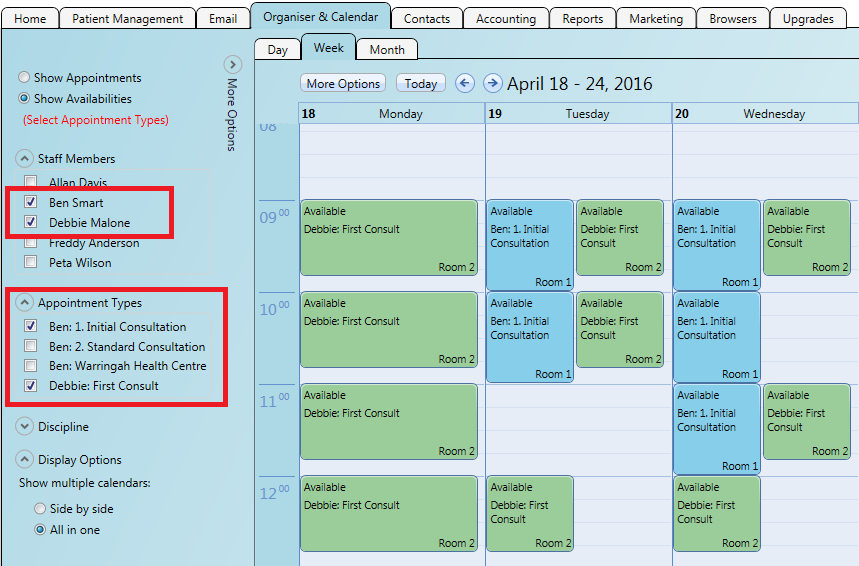
The image above shows two users selected and one of each of their appointment types. The calendar is in 'All In One' mode so the availabilities are shown on a single calendar and colour coded by user so you can tell the apart.
The 'More Options' pane gives you all you need to find availabilities quickly even if you have a busy reception and lots of practitioners with different appointment types, durations and locations.
The 'More Options' panel is a bit like a 'Search' panel where you set criteria and display results on the calendar.
In Appointment view you can search by:
You can create several appointment types on the calendar including:
Step 1
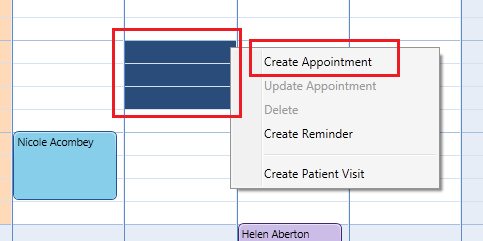
To create a new appointment drag on the calendar to select the start and end dates (the duration) of the appointment, then right click the selection and choose
'Create Appointment' from the shortcut menu.
Step 2
You can fill in the details of the appointment in the 'Appointment Details' window. Some important fields are:
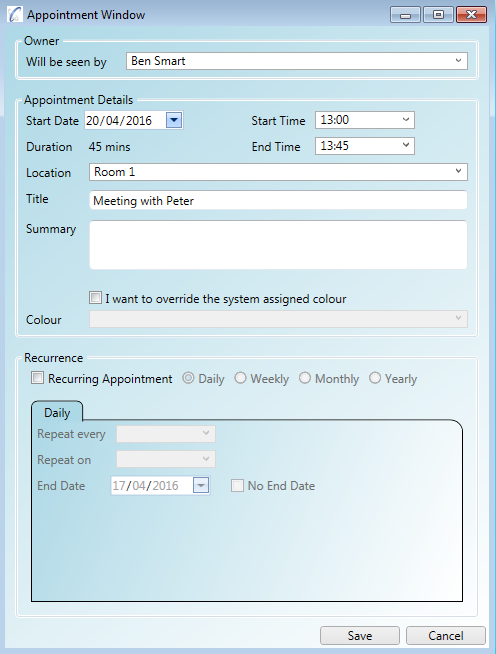
Notice you can override the system assigned colour in the appointment window above.
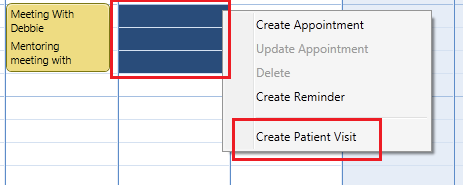
Step 1
Select the start and end points on the calendar then right click the selection and select 'Create Patient Visit' in the shortcut menu.
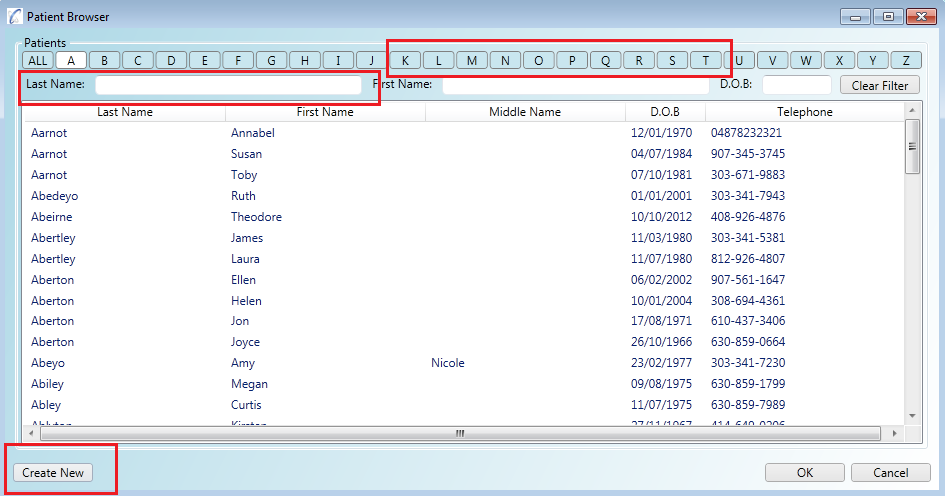
Step 2
Select the patient you want to create the visit for, remembering you can search using the textboxes and the surname start characters in the
'Patient Browser'. You can use the 'Create New' button to create a new patient from this screen.
Step 3
You can enter the appointment details (or change them as you wish) in the 'Visit Appointment Details' window.
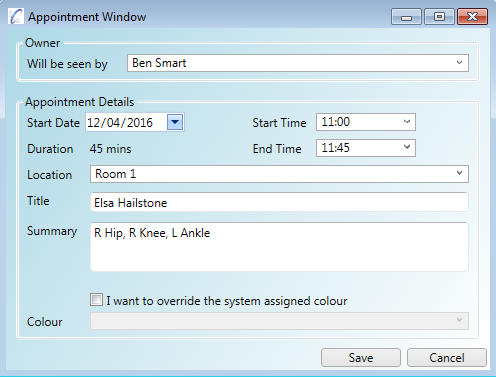
Notice you can override the system assigned colour in the appointment window above.
To edit appointments you can:
The image below shows an appointment that is in the process of being re-sized to change its duration.

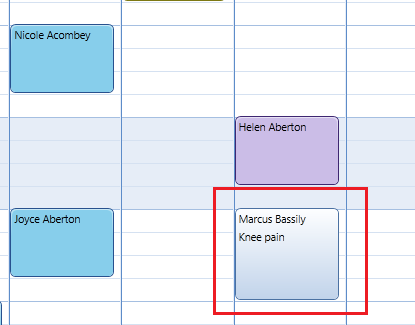
Appointments booked online will flow back in to your application automatically. If the appointment is for a new patient who is not currently in your system, or if the details provided by the patient online were not sufficient for the patient to be found automatically, the appointment will appear greyed out.
Step 1
If the appointment is for a new patient or one that could not be automatically matched in the system, you can right click the appointment to find or create the patient.
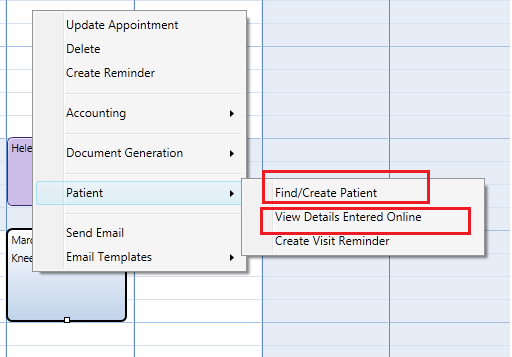
Step 2
If you cannot find the patient yourself and are satisfied they are new you can go ahead and click the 'Create New Patient...' button to enter them and link them to the appointment
in a single step.

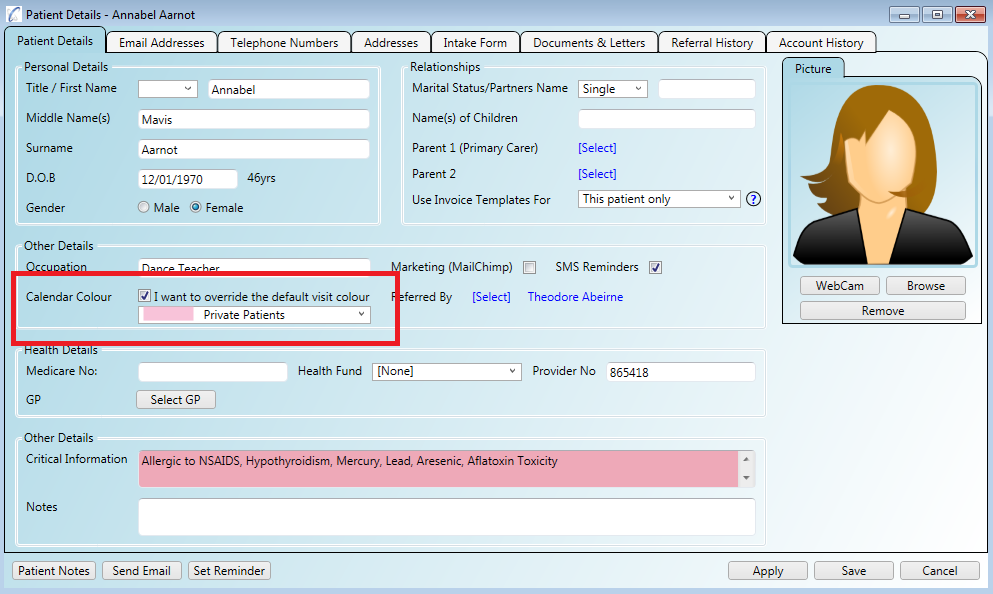
You can specify your own custom calendar colours in the administration section and give them meaningful names for your staff to use such as 'Private Patients' or 'Child Patients' etc. The calendar will assign a colour for you for your appointments and you can also override the colour if required.
The calendar is able to alert you to important information about the patient or visit 'at a glance'. A couple of examples of this are:
You can also set a default calendar colour for a patient so that any time a visit is booked for them their appointment will appear a specific colour in the calendar. If you open up the 'Patient Details' screen for a patient you will notice the ''
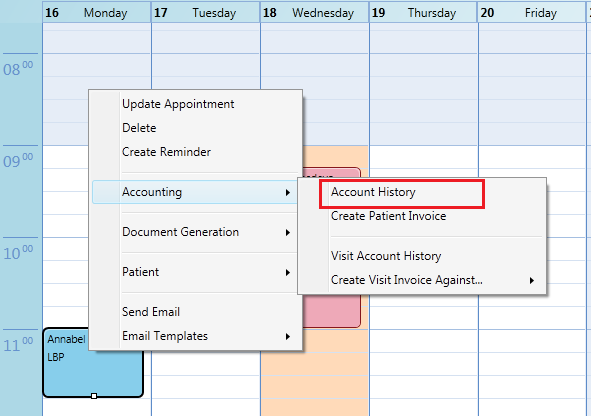
There are many right-click shortcuts built in to the organiser to help you navigate quickly through the application and to perform common tasks quickly. Some of the features include:
If the appointment corresponds to a patient visit:
The image below shows an appointment that is being right clicked to open the patient's account history.