
Email Templates
Create reusable emails with bindable data items and optional AI-generated content, personalised using the record or appointment you start from.
Key Activities
- Create shared practice templates or private templates for individual users.
- Prepare subjects, formatted message content, attachments and mailbox settings.
- Insert bindable fields from the Add Data Item dropdown.
- Merge details from the patient, contact or appointment context supplied when generating the template.
- Generate personalised text using an AI Hint and selected patient note history.
Overview
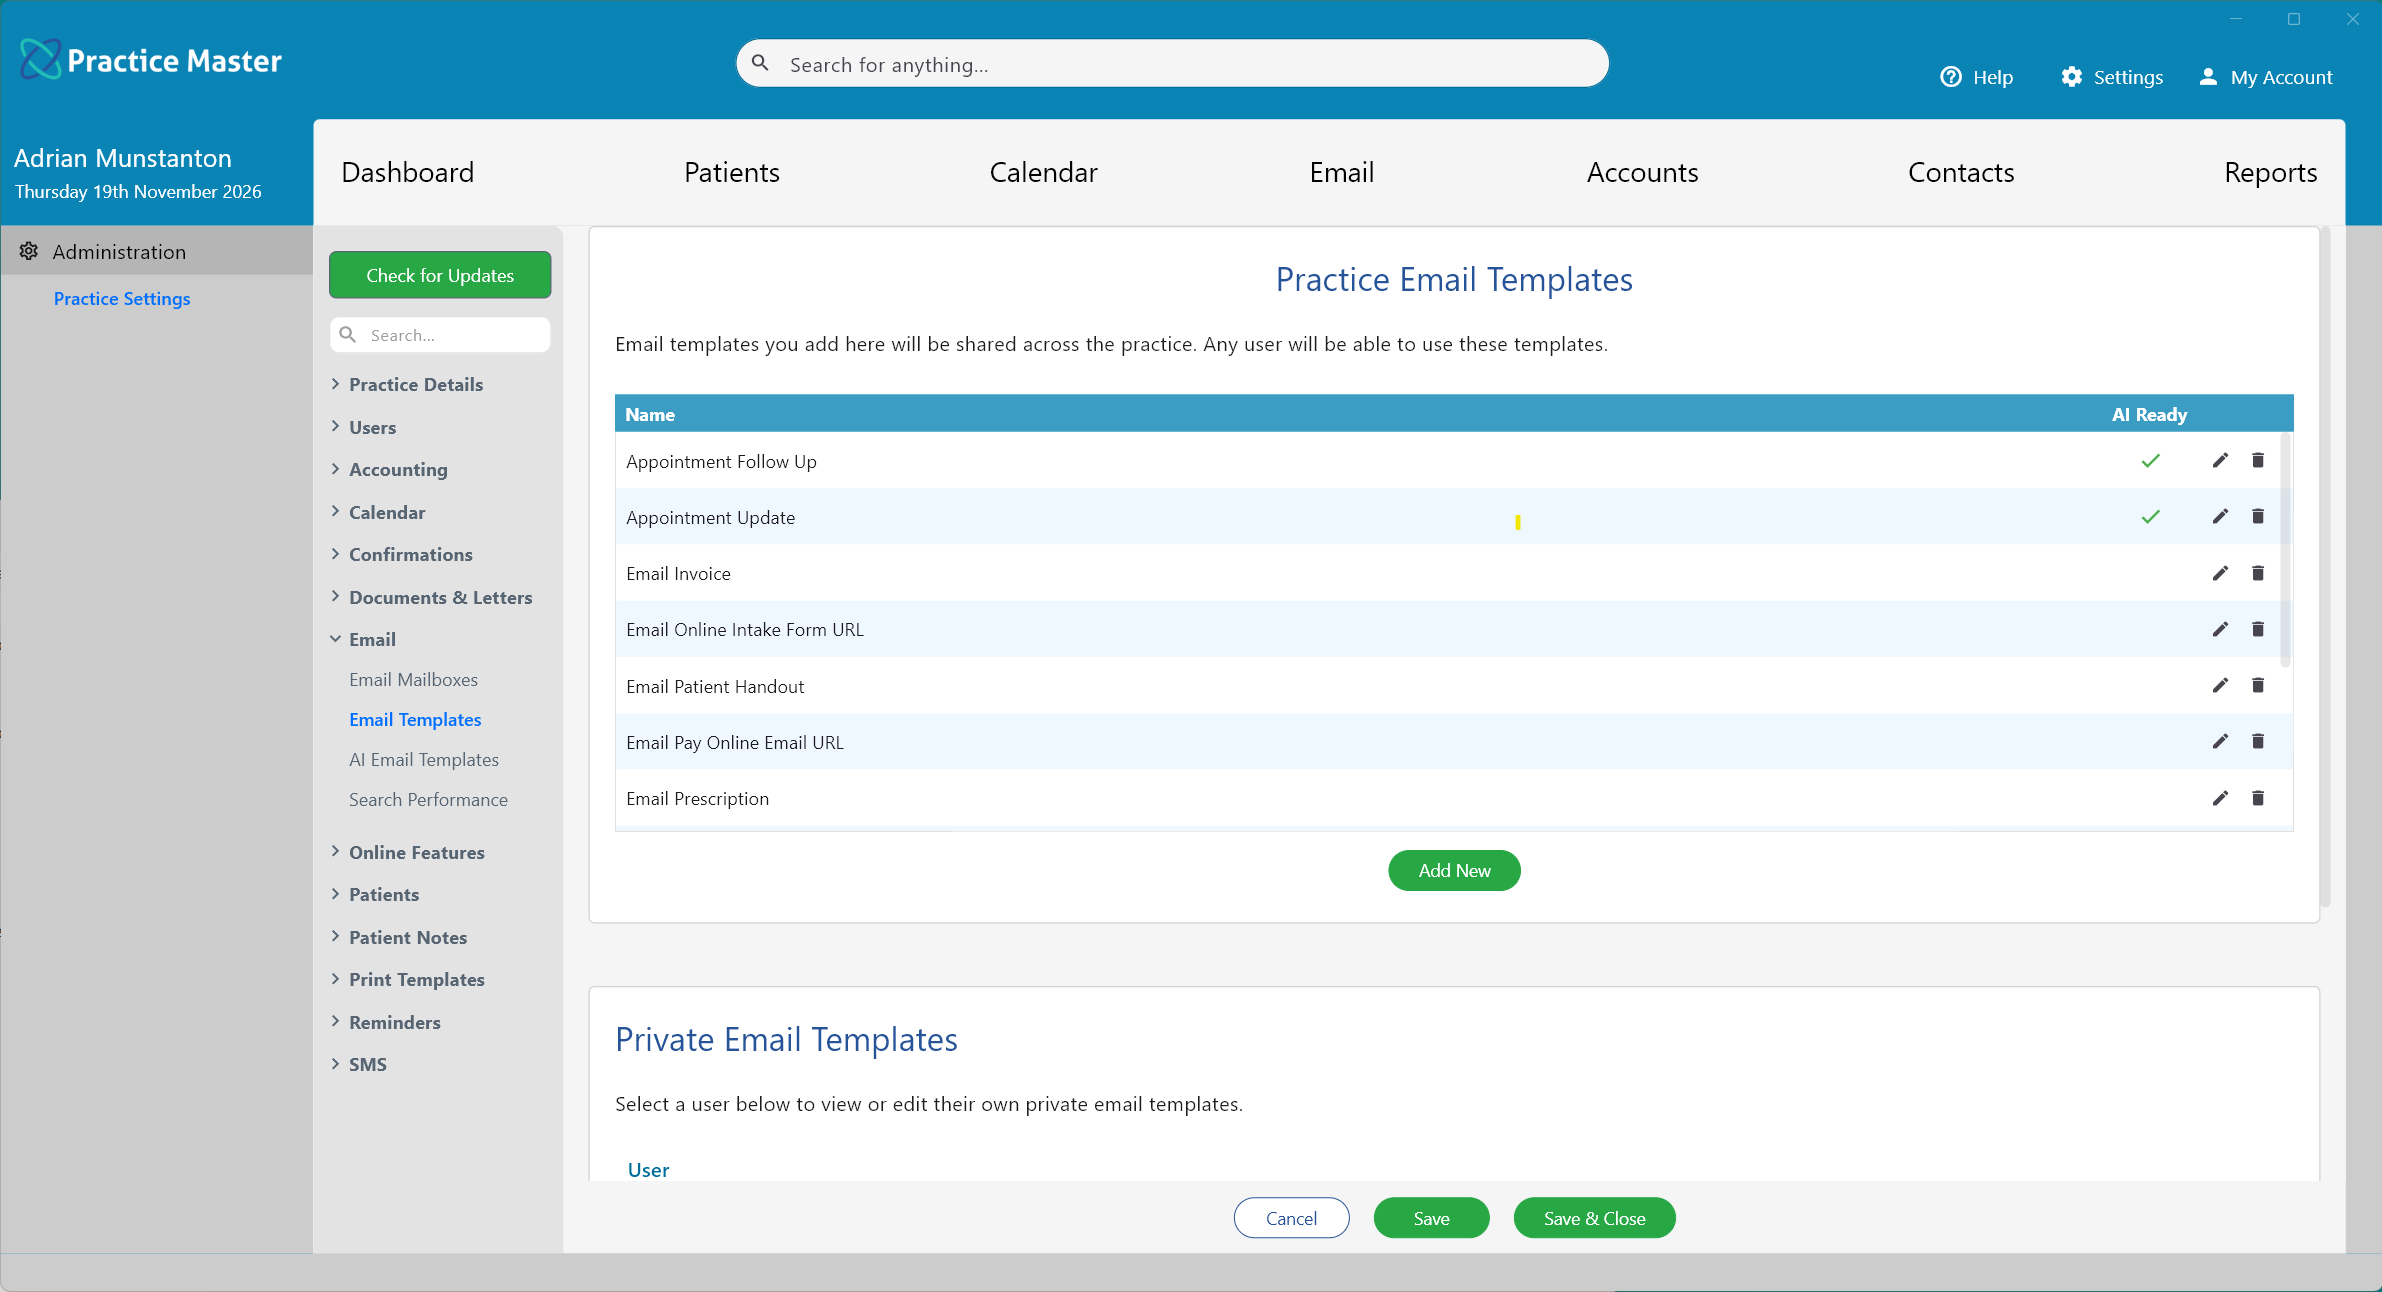
Email templates combine standard wording with bindable data items, such as the recipient's first name, practitioner name and practice details. Manage them in Settings > Email > Email Templates. Practice templates are available to all users; private templates belong to individual users.
The template receives the context available where you generate it. Right-clicking a patient supplies the patient and patient notes context. Right-clicking a patient booking on the calendar supplies the patient, appointment and notes context, so the template can also use appointment details. Choose a starting point that supplies the information your template needs; a field can only merge information available in that context.
Manual and AI email templates
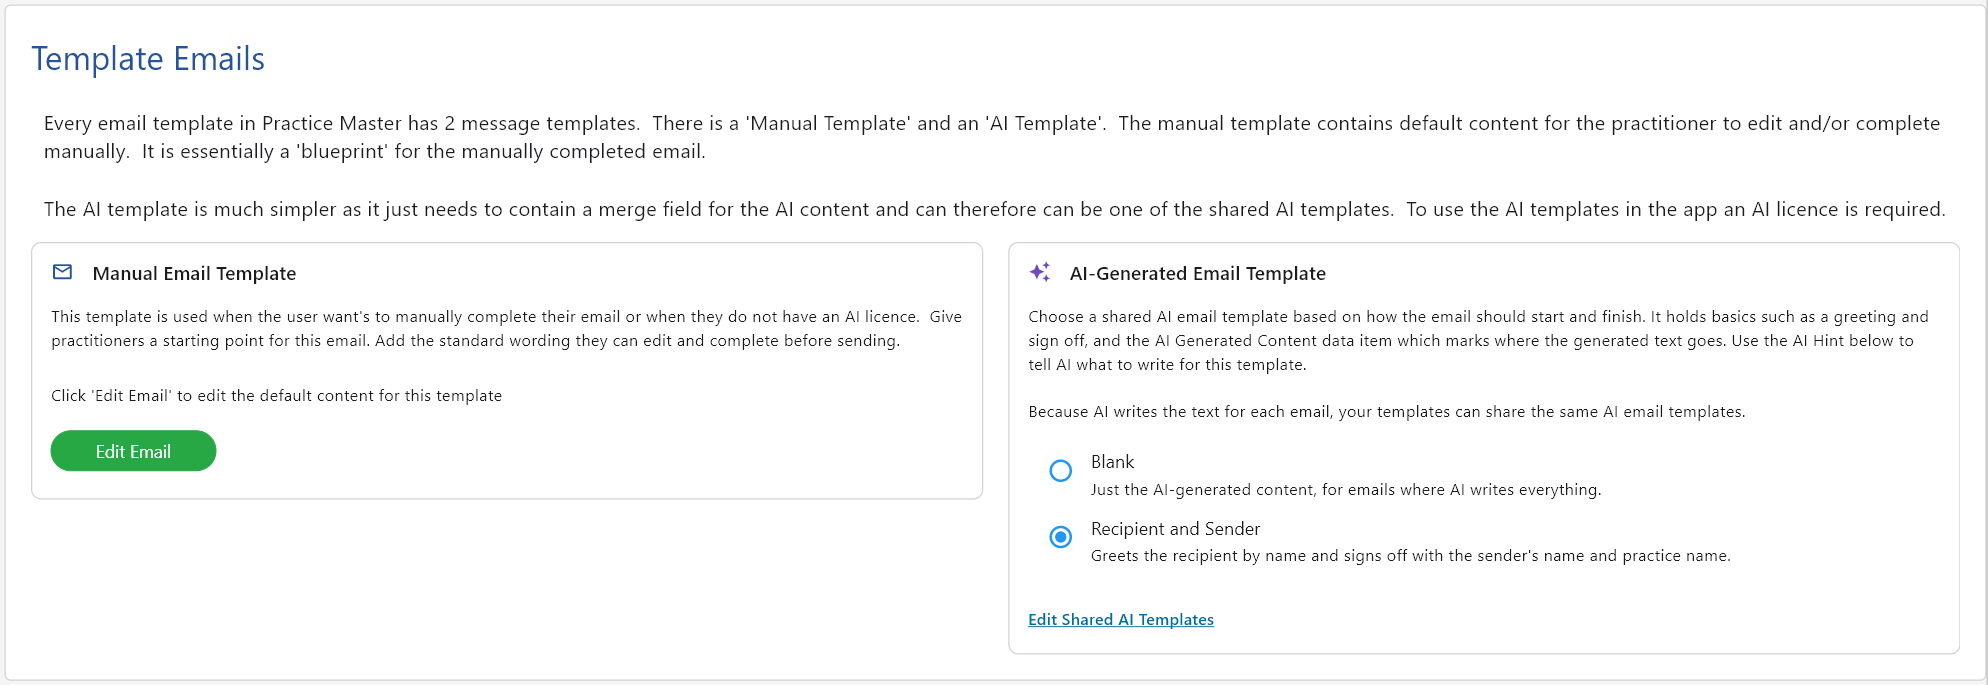
The Template Emails panel in Edit Email Template shows two ways to prepare the message for the same email template. For example, Appointment Follow Up can provide standard wording for a practitioner to complete or generate a personalised draft with AI.
- Manual Email Template is used when practitioners write the email themselves or when they don't have an AI licence. Click Edit Email to add standard wording and bindable data items that practitioners can work from before sending.
- AI-Generated Email Template requires an AI licence. Choose a shared template to control how the message starts and ends. Blank contains only the generated text. Recipient and Sender adds a greeting using the recipient's name and a sign-off with the sender's name and practice name.
Common Tasks
The following common tasks can help you get the most out of this screen:
Add or edit an email template
- Open Settings > Email > Email Templates.
- Use Practice Email Templates for templates shared across the practice, or select a user under Private Email Templates to manage their private templates.
- Click Add New, or use the edit button beside an existing template.
- Enter a descriptive Name and the email Subject. Select the Mailbox to use as required.
- Use Add Attachment and Cc/Bcc if needed.
- Under Manual Email Template, click Edit Email to write the default message. Insert bindable fields using Add Data Item.
- Save the template. Use Save or Save & Close on the settings page.
Insert bindable fields with Add Data Item
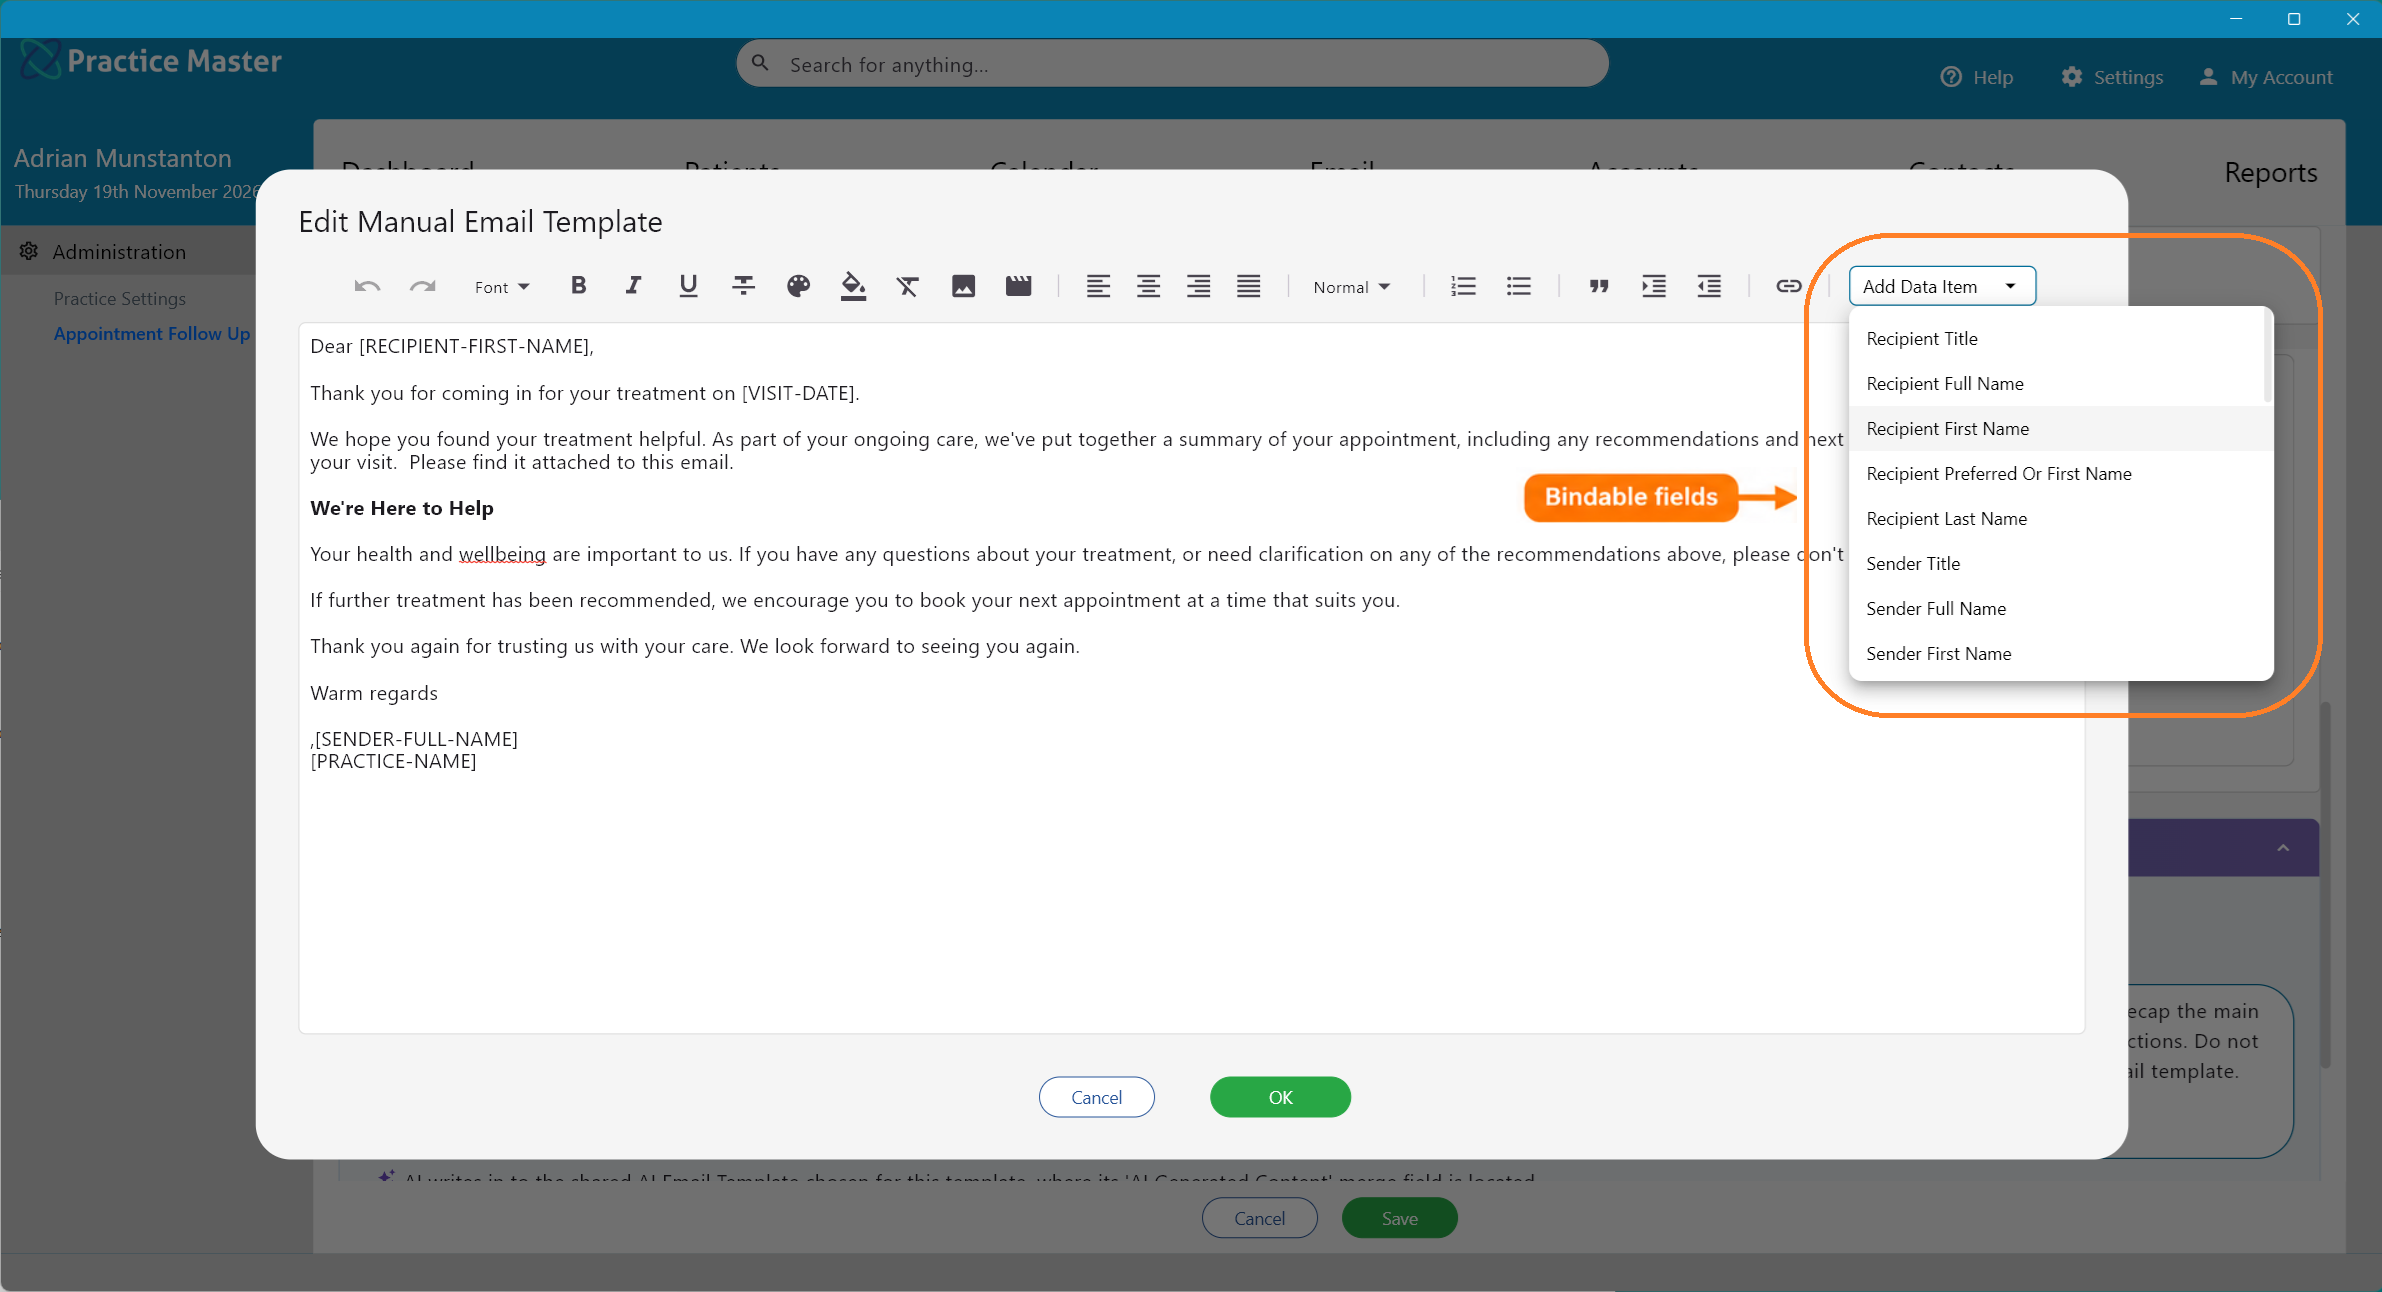
- Place the cursor in the message where a detail should appear, such as after Dear for a greeting.
- Open Add Data Item at the right end of the message toolbar. This dropdown contains all the available bindable fields.
- Select a field, such as Recipient First Name, to insert its placeholder at the cursor.
- Repeat for the details you need. For example, use recipient details for the greeting and practitioner and practice details for the signature.
- Choose fields that match the context from which the template will be generated. Practice Master merges the supplied data into these fields when creating the email.
Configure AI-generated content
- Under AI-Generated Email Template, choose a shared AI template. Its AI Generated Content merge field determines where the generated text appears.
- Use Edit Shared AI Templates if you need to change the shared wording or move the merge field. Multiple email templates can use the same shared AI template.
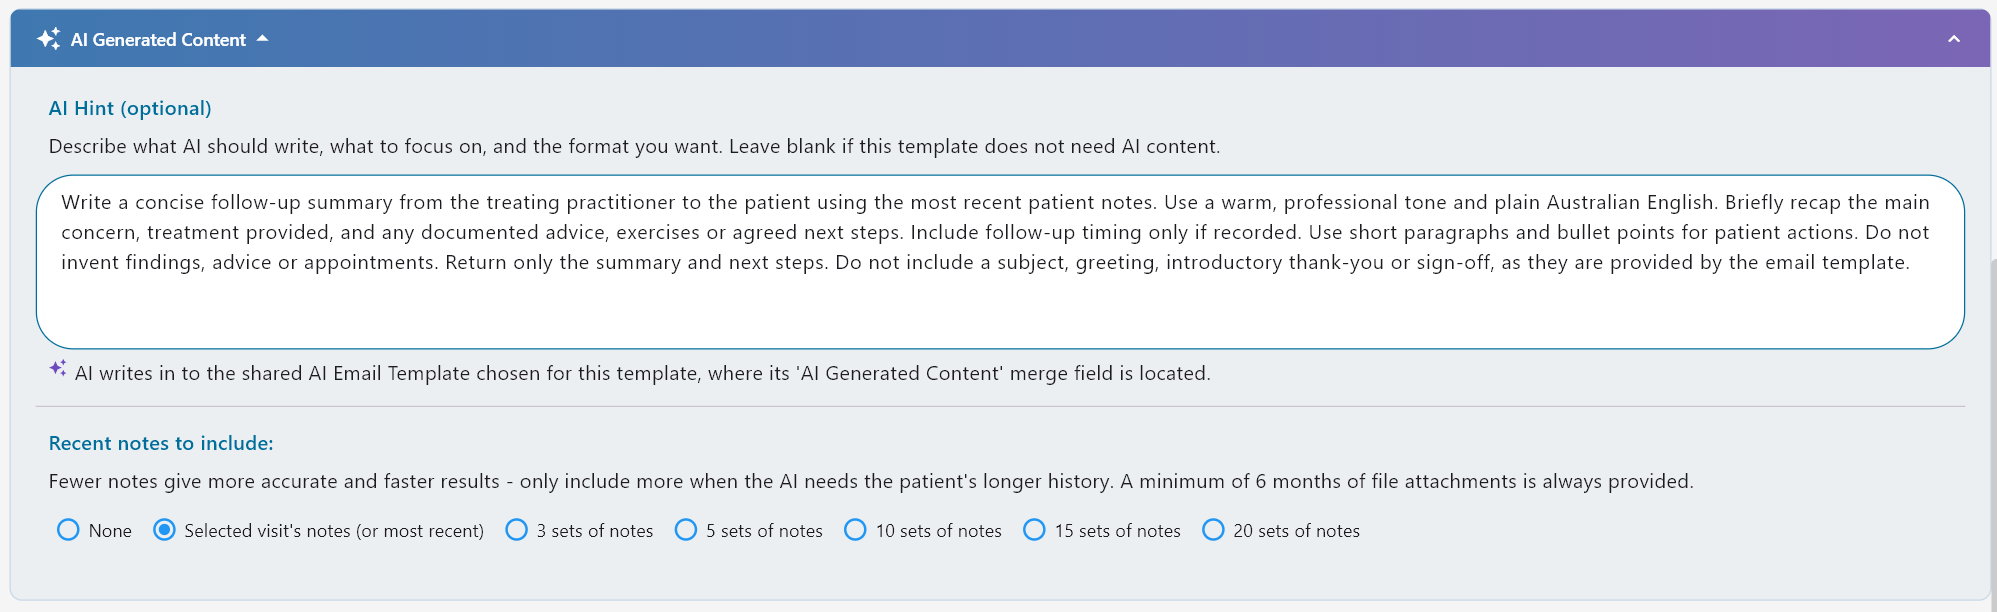
- Expand the AI Generated Content panel and enter an optional AI Hint for this email template. Describe what to write, who it is for, what to focus on and the format you want.
- Choose the patient history context: Most recent notes only, 3 sets of recent notes, 5 sets of recent notes or Max history (10 years or 20 sets of notes).
- If your template already provides the greeting, introduction and signature, tell the AI Hint to return only the content that belongs between them.
- Save the template and settings. When generated with patient context, the selected notes context is used to write the content at the AI data item.
Example AI Hint for an appointment follow-up
Write a concise follow-up summary from the treating practitioner to the patient using the most recent patient notes.
Use a warm, professional tone and plain Australian English. Briefly recap the main concern, treatment provided,
and any documented advice, exercises or agreed next steps. Include follow-up timing only if recorded.
Use short paragraphs and bullet points for patient actions. Do not invent findings, advice or appointments.
Return only the summary and next steps. Do not include a subject, greeting, introductory thank-you or sign-off,
as these are provided by the email template.
Generate a template with the right context
- Find the patient, contact or calendar booking relevant to the message and open its right-click email template options.
- Select the required email template. The record you start from supplies the context used to merge its bindable fields.
- For example, right-clicking a patient supplies patient and patient notes context. Right-clicking a patient booking in the calendar also supplies appointment context.
- For templates with AI content, the AI Hint guides the text generated from the available context and selected patient note history.
- Review the populated email before sending, checking the recipients, sending mailbox, merged details, generated content and attachments.
Screen Reference
A detailed description of various screen elements:
Name and Subject
Name helps users find the template. Subject provides the subject line for the generated email.
Mailbox, Add Attachment and Cc/Bcc
Use these controls to prepare the sending mailbox, attachments and copy recipients. Check the resulting details when reviewing the generated message.
Add Data Item
The dropdown on the message toolbar contains all bindable fields, including recipient, sender and other available details, and AI Generated Content. Insert items at the cursor to mark where merged information should appear.
AI Hint
Describes what AI should write, what to focus on and the desired format. Leave it blank for templates that do not need AI content. Generated text goes into the AI Generated Content merge field in the selected shared AI template.
Patient History Context
Choose how much patient note history to supply when the template is applied to a patient. For an appointment follow-up, select Most recent notes only to focus on the latest notes. The panel also states that a minimum of six months of file attachments is always provided.
Tips
Helpful tips for this screen are below:
- Use descriptive names, such as Appointment Follow Up, so users can find the right template.
- Test the template from the context in which it will be used, including a calendar booking if it relies on appointment details.
- Keep greetings and signatures out of the AI output when they are already included in the message template.
- Review merged details and AI-generated content for accuracy before sending.
See Compose Email for help with recipients, formatting and attachments, or Email for help managing accounts and messages.